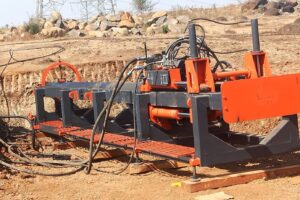
Lathe chuck jaws are very important parts of a lathe machine. They help hold the workpiece tightly while the machine cuts, drills, or shapes the material. If these jaws are not working well, it can lead to poor results or even accidents. That’s why it’s important to know how to replace and maintain them.
A study shows that around 30% of lathe accidents happen because of poor jaw maintenance. Worn or damaged jaws can slip or break while the machine is running, which is dangerous. By learning the right way to take care of your lathe chuck jaws, you can improve your work and keep your shop safe.
Understanding the Role of Jaws in a Lathe Chuck
Lathe chuck jaws are what hold the material (like metal or wood) in place. Without them, the workpiece would move or fall out while turning.
Different Types of Jaws
There are many types of lathe chuck jaws, but the most common are:
-
Standard jaws – These come with most chucks and work for general jobs.
-
Soft jaws – Made from softer materials like aluminum. Good for custom shapes and delicate parts.
-
Self-centering jaws – Move together to hold the workpiece in the center. Best for round or balanced pieces.
Each jaw type helps grip the workpiece in a different way. Picking the right one depends on what kind of material you’re working with and how precise you need the cut.
Signs Jaws Need Replacing
You should look for these signs that tell you the jaws are no longer safe to use:
-
Worn or dented surfaces – This can lead to slipping.
-
Slipping during work – If the workpiece moves, the jaws may be too worn.
-
Visible cracks – Any cracks are a sign of damage and danger.
-
Deformed shape – If the jaw looks bent or twisted, replace it.
How to Remove Old Jaws Safely and Correctly
Replacing jaws is not hard, but you must do it carefully to avoid damage or injury.
Preparing Your Workspace
Before starting, follow these steps:
-
Clear the area – Remove anything not needed near the lathe.
-
Wear safety gear – Safety glasses and gloves are a must.
-
Disconnect power – Make sure the lathe is turned off and unplugged.
-
Lock the spindle – This keeps the chuck from moving.
-
Gather your tools – You’ll need a wrench, screwdriver, and maybe a soft mallet.
Removing the Jaws
To remove the jaws:
-
Loosen the screws – Use the right tool to slowly loosen the bolts or screws.
-
Use a soft mallet if stuck – Gently tap the jaw if it doesn’t come out easily. Never use too much force.
-
Remove one jaw at a time – This helps keep things balanced.
Checking for Hidden Damage
After you remove the jaws, inspect the chuck itself:
-
Look for cracks or bent areas on the chuck body.
-
Check the mounting surface where jaws connect. It should be smooth and flat.
-
If the chuck is damaged, replace it before adding new jaws.
Installing New Jaws Effectively
Once the old jaws are removed and the chuck is in good shape, you can install new jaws.
Selecting the Right Jaws
Make sure your new jaws:
-
Match your lathe model – Always check the manufacturer’s specs.
-
Are the right size for the workpiece.
-
Are made of the right material for your job (steel for hard parts, soft jaws for delicate parts).
Mounting New Jaws Properly
-
Clean the chuck surface – Remove dust, oil, or metal chips.
-
Position jaws evenly – Insert each jaw in the correct slot (usually numbered).
-
Tighten in a cross pattern – This gives even pressure and a firm grip.
Testing Jaws Post-Installation
Before using the lathe:
-
Do a test run without any material.
-
Watch for wobbling or shaking.
-
Listen for odd sounds.
-
If it’s not smooth, tighten the jaws again or recheck alignment.
Maintenance Tips for Lathe Jaws
To keep your lathe chuck jaws working well, follow these simple care tips.
Regular Inspection Routine
Check your jaws often:
-
Weekly checks – Look for signs of wear or damage.
-
Monthly tests – Make sure the jaws still grip tightly.
-
Use a magnifying glass to spot small cracks early.
Proper Cleaning and Lubrication
Clean jaws help your lathe run better:
-
Clean after every use – Wipe jaws with a soft cloth or brush.
-
Apply light oil – Lubricate moving parts so they don’t stick.
-
Don’t over-oil – Too much oil can attract dust or chips.
Replacing Jaws at the Right Time
Don’t wait too long to change jaws:
-
Use the 50% wear rule – If half the jaw is worn down, replace it.
-
Replace jaws if cracked or chipped.
-
Keep extra jaws in stock for fast changes when needed.
Troubleshooting Common Issues
Even with care, problems can happen. Here’s how to fix common jaw issues.
Jaw Slipping During Machining
If the jaws are slipping:
-
They might be too worn or loose.
-
Make sure they are tightened properly.
-
If slipping continues, replace them.
Uneven Grip or Workpiece Deformation
If the cut looks uneven:
-
Check if the jaws are aligned properly.
-
One jaw may be mounted wrong or damaged.
-
Replace any bad jaw, then test again.
Pro tip: Some shops use a dial indicator to check jaw alignment for perfect precision.
Conclusion
Taking care of your lathe chuck jaws helps your machine run better and safer. Here’s a quick review of what we learned:
-
Always check for signs of damage like wear, cracks, or slipping.
-
Use the right tools and steps to safely remove and install jaws.
-
Clean, inspect, and lightly oil your jaws to keep them in good shape.
-
Replace jaws before they become a risk.
Final tip: Don’t wait for a problem. By keeping a regular maintenance schedule, you protect your tools, your work, and yourself.